I’m Now Accepting Donations For Clippy

I’m Now Accepting Donations For Clippy

I just finished setting up a Pledgie campaign in order to raise money to support the development of Clippy, my clipboard manager for Android. If you use Clippy, and find useful, please consider making a small donation. Clippy is currently a 100% free application, no strings attached, and in order to keep it that way, I need a way to make a little bit of money. Clippy is currently a one-man project, and I do all the work I do on it during my spare time. I have invested many hours into developing Clippy, and I’m hoping that some of that work will start to pay off soon.  The more money that is donated to the Clippy project, the more time I’m able to invest in developing and supporting Clippy. Also, as an added incentive to encourage donations, if I receive over $20,000 $10,000 in donations, I will release the entire source code for Clippy under version 3 of the GNU General Public License, and all of the resources, including the original vector graphic files, under the Creative Commons Attribution 3.0 Unported License.  In addition to that, I’ll set up a repository on github to encourage open development, and allow others to contribute code. I got the inspiration for this idea from an independent gaming package called the “Humble Indie Bundle“, where you could pay what you want for a package of 5 games. Basically, they offered to make their games open source if they could raise $1 Million. Needless to say, they succeeded. So, in the spirit of the Humble Indie Bundle, I’m offering to make my application open source if I can raise $10,000, which is practically pocket change compared to the goal they set, yet still a very substantial amount to me. If you don’t feel like signing up for Pledgie, you can make a donation using traditional PayPal, but I’d have to manually enter your donation into Pledgie for it to count towards the $10,000 goal.

Click here to lend your support to: Clippy Clipboard Manager and make a donation at www.pledgie.com !

Clippy Now Has Its Own Page on My Blog!

Clippy Now Has Its Own Page on My Blog!
It’s about time I made a page dedicated just to Clippy, which, at this rate, is becoming a larger project every day. This page will be used to explain the purpose of Clippy, list it’s features, and talk about useful tips and tricks that can make using Clippy a better experience. The page is still under construction, but I’m pretty happy with how it looks right now, and I’m planning on updating the page and adding new content as I continue to work on the Clippy project. Even though Clippy already has many useful features, and it can probably be useful on a daily basis, Clippy is still missing a lot of functions that will take it from “Pretty Good” to “Great”. Because I’d probably forget to add features to the page later, I added some features that don’t exist yet/don’t work right to the list of features on the Clippy page. These features are marked in red text, so that you can easily identify them. If you have any feedback about the page, or any suggestions for content that you believe I should add to it, feel free to let me know.

New Clippy Icons (Colored and Grayscale!)

New Clippy Icons (Colored and Grayscale!)
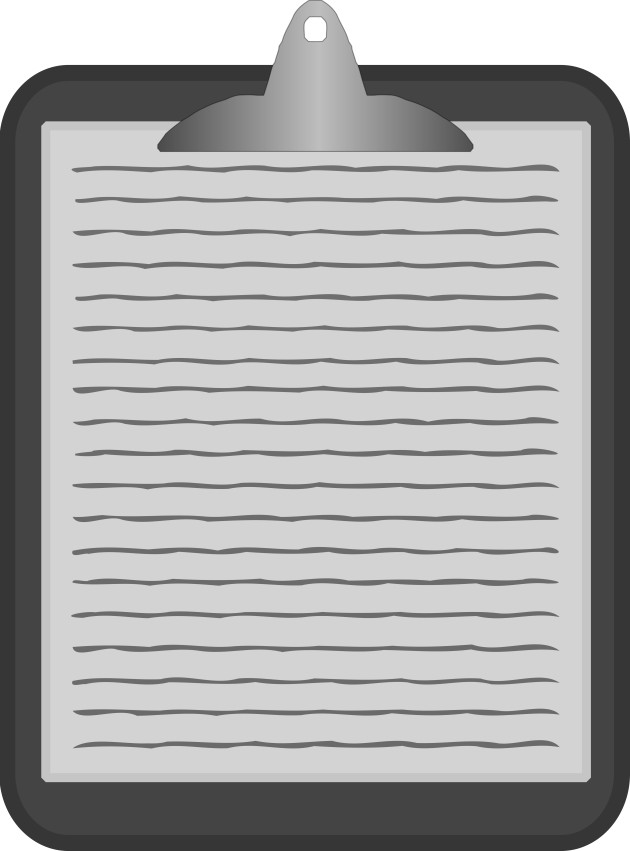
When I originally designed the Clippy icon, I made it using a free, open sourcegraphics editing program called GIMP, and saved it as a 720×720 PNG image. While 720×720 is a large resolution, large enough for almost anything I need to use my icon for, it’s still a raster image format, and it doesn’t scale well. This also results in it being more difficult to edit the image and make changes, such as editing colors, resizing it, etc. If you don’t care about all the technical details, scroll down to the end of this post to check out the new icons. Otherwise, continue reading. To solve this problem, I opened up the original image in Inkscape, a free and open source vector graphics editing program, and traced the paths of the “clip” and the “writing” from the original clipboard image, converting them into vectorized paths. I used the “Exclusion” tool to create the hole in the clip. I then created a new rounded rectangle as the new ‘base’ of the clipboard, with a fill color that matched the inside color of the base in the raster image, and a stroke color that matched the color around the edge of the clipboard in the old raster image. After making sure that I had the stroke width exactly the same length as the border of the base of the old image, I lined up the rounded rectangle with the upper left corner of the base of the old image, and resized it so that the bottom right corner lined up with the bottom right corner in the previous image. I then messed with the radius of the new base’s corners until it lined up almost perfectly with what I had before.  At this point, I had the “writing” scribbles, the “clip”, and the new clipboard base recreated in glorious SVG format. I then put all three parts on their own layers, organizing them (from top to bottom): “Clip”, “Writing”, “Board”. Because I had the base of the clipboard done at this point, I locked that layer so I wouldn’t accidentally mess it up, and then I selected all of the writing. I then changed the fill color of all of the writing at once to match the fill color in the previous image. Since at this point I already had the “writing” exactly where I wanted it, and the writing was already in path form, I used the “Simplify” feature under the path menu, to clean up the paths of the writing a little bit, as it doesn’t have to be exact, since the “writing” is only a bunch of wavy lines anyways. Now that I had the “writing” taken care of, and the “board” complete, with their colors similar to what I had in my previous icon, I was mostly done. All I had to worry about now was shading the “clip” (at that point in time, I only had the outline of the clip, with no fill color), and recreating the “paper”, for the “writing” to go on. I used the “hide layer” function to get the clip out of the way for now, and I began creating a new rectangle (not rounded this time) with the exact same dimensions as the old image’s “paper”, by, once again, lining up the upper left and bottom right corners. After making sure that I had the border length exactly the same as the border length of the old “paper”, and then I set the fill color and stroke color to match the colors in the original image. All that was left was filling in the “clip” with a gradient. After playing around with the linear gradient settings for a while, I finally had something that I was satisfied with, and I truly believed that it might even be better than the original Clippy icon. Since the new icon came out so great, I figured that it would be a good idea to make a grayscale version of the icon, for things like the notification bar icon, which typically don’t have any coloration. So, I saved the colored image, and fired up Inkscape again, and got to work. Keeping all the sizes and positioning of the layers the same, I messed with the fill and stroke colors until I had a nice looking, Android-style grayscale image. Unfortunately, due to WordPress.com‘s file type limitations, I can’t upload any SVG files, so, unfortunately, you won’t be able to see these images in their original, lossless forms, but I can, however, upload rasterized renderings of the images saved as PNG files. To accurately show the difference between the new vector images and the old raster images, I rendered these images at a very high resolution. As you can clearly see, just by looking at the images, there is absolutely no loss of clarity in the vector image rendering, where the original raster image becomes significantly pixelated when scaled. Also, even though it’s possible to scale the vector icons to almost any size without the quality degrading, their size is actually significantly less than the original raster images. Anyways, here are the links to the images, so you can check them out for yourself:

Let me know what you think about the new icon by leaving a comment on this post!

Note: There is no “old” grayscale image, as I created it originally when I converted the colored image to SVG.

UPDATE: I made some slight changes to the gradient used in the ‘clip’ of the colored logo. It now looks shinier, and closer to the original raster image. Also, I slightly improved the subtle gradient used in the ‘board’ of both vector images. The images on this page are now updated to reflect that change.

Clippy Public Beta 0.1.6 Released

Clippy Public Beta 0.1.6 Released

After a long night of coding, I finally released the final version of Clippy Public Beta 0.1.6. If you haven’t seen the list of improvements made in this new version, check out my previous post. This new version is more stable than the previous version. Between the previous version and the version I just uploaded to the Android Market, I fixed many important bugs, introduced working find functionality, added more settings, and, overall, made Clippy more full of win and awesome than I ever thought possible. The new version is in the market, so for those of you who have a previous version, you will soon receive a new update notification. I’m really tired, since I was up all night working on coding Clippy, so I’m going to keep this post short. Let me know if you find any bugs or if you have any suggestions for future releases by posting a comment on my blog, or sending me an email. Enjoy! 🙂

Clippy Public Beta 0.1.6 is in progress

Clippy Public Beta 0.1.6 is in progress

I’ve been working on the next iteration of the Clippy project, Clippy Public Beta 0.1.6. In this release, I have made several major changes already, including:

  • All reading/writing to the database is now handled by the Clippy Service
  • Adding a notification bar icon, as well as a notification that allows you to easily get back into Clippy from the notification bar
  • Created a custom notification layout for usage in the notification bar
  • Fixing a major bug where rotating the screen would restart the Clippy Service (only noticeable in verbose mode)
  • Moving most hard-coded strings into a string resource file to allow for easier localization
  • Adding several additional log messages
  • Implementing an AIDL interface to allow other classes to interact with the service
  • Added several more preferences in the settings menu
  • Added debugging tools, including the ability to replace all of your clippings with sample content copied from Wikipedia
  • Completely recreated the “About” tab layout from scratch, using much better written code
  • Enabled the “testing mode” for AdMob ads when the application is running in the emulator
  • The find functionality now works perfectly, and the background of the interface for find is now transparent instead of being solid black
  • The “Search” button now opens/closes the find bar for easy access to the find functionality
  • Added a preference to the Settings screen that allows you to choose whether or not the find function is case sensitive (by default, the find function does not pay attention to case)

And several other, less noteworthy improvements. I am planning on releasing this new version to the Android Market soon.

Clippy Public Beta 0.1.5 Released

Clippy Public Beta 0.1.5 Released

I just released version 0.1.5 of the Clippy Public Beta. In this version, I made a ton of major interface improvements, in fact, I think you might not even be able to recognize it any more. There is a new settings menu, but for the moment, I am not allowing users to enable the settings, as some of them may cause serious problems, as they are not fully developed yet. I am speaking from experience, especially on the auto-start setting. Just trust me on this one, it’s not worth enabling those settings yet. I decided to disable them so I could rush out a new release, as the version in the market was gradually becoming archaic. Also, many additional abilities have been added, such as sending the clipboard/clippings as emails and text messages. If you’re wondering where the menus that were previously at the bottom of the screen no matter what went, they are now located in the context menu. You can access them by pressing the menubutton. Also, you may notice that the icon in the applications drawer is now simply labeled “Clippy”. However, as you will immediately notice when you enter the application for the first time after upgrading, this is still a beta, and it’s not yet stable. I wish I could go into more detail about all the dramatic changes that I made in this new release, but I’m really tired at the moment, and I just got done working for hours on releasing a new version for you guys to play with. I’ll probably update this post later, and go into more specific details. Also, you’ll be glad to hear that I made no database changes at all in this version, so your data should be safe if you are upgrading from a previous version. Try the new version out, and let me know what you think! Screenshots coming soon!

New Clippy Release Coming Soon

New Clippy Release Coming Soon

I’ve been working hard on Clippy’s new look, and it’s getting better and more useful all the time! Expect to see a new major release in the Android market soon! There is still, however, some functionality that I don’t have implemented yet, that I hope to get working soon. However, I am unable to find any significant regressions in functionality since the current version in the market, so I don’t think I have much to worry about in terms of things not working right. However, I would like to get some more things working, and add some more features to the interface to make it easier to use. The interface is turning out really nicely so far. In fact, it’s getting so good that it might as well be a standalone text editor, as it’s quickly gaining quite a broad range of functionality. I was actually considering reusing a large portion of the code, and making another application dedicated to editing text, since they would share a common code base, but first I have to get more work done on Clippy.

UPDATE: I’m working on preparing the next iteration of the Clippy Public Beta for release right now. Expect to see it in the market soon.

Minor Clippy Regressions

Minor Clippy Regressions

I’m currently postponing the release of Clippy due to several small, but significant regressions that I am experiencing. I want to ensure that those of you who have downloaded and used a previous version of Clippy, such as the current version in the market feel comfortable using the new version that I am about to release. Because of some significant changes in the way I have Clippy written, such as using of XML-based menu resources instead of generating the menus using source code when the application runs, I have run into several problems that I am looking into. Rest assured, I will be releasing a new version of Clippy soon. However, at the moment, there are several regressions such as this one:

  • When there is no text in the text editor, the “Save”, “Edit”, and “Clear” buttons are no longer disabled. This worked perfectly while I was using menus generated using code, as I could set whether or not the menu items are enabled, however, when I switched to XML-based menus, attempting to set any attributes of the menu items results in the entire application crashing with a NullPointerException.

Once I get most of the regressions fixed, I will release an update of the code on the market.

UPDATE: I figured out how to set whether or not the MenuItems were enabled or not. Instead of using the findViewByID() method, I had to use menu.findItem().

UPDATE 2: Email sending now works properly, and I added a send button to the context menu of the “Current” tab.

Automatically Start Clippy Service on Device Boot

Automatically Start Clippy Service on Device Boot

I’m currently working on making it possible to have the Clippy service start as soon as your device turns on in order to automatically monitor the clipboard. This feature will be completely optional, and this feature will not be enabled by default.

Clippy Update: Clipping Saving is Fixed!

Clippy Update: Clipping Saving is Fixed!

I finally fixed the issue I was having with saving clippings. In fact, there was no problem in the first place. The reason I thought there was one, is because I was having Clippy generate sample content for the clippings page, in order to debug. Every time I went to the “Clippings” tab, the content I added was being overwritten by the sample content, making me assume it was not saving. This is no longer an issue. As soon as I finish fixing regressions, there will most likely be a new update on the market. The next step on my agenda is to have database management handled by the service.